| Smoother Blends Cutting and pasting images in
Photoshop can be a laborious process. If the
joins are to appear seamless, a lot of time has
to be spent perfecting the outline masks. I work
as a professional photographer and use Photoshop
to produce photo montages for clients as well as
my own picture library shots. It is best to start
planning a montage at the shooting stage -
photographing a subject against a plain backdrop
will make it easier later to create a mask on the
computer. Other factors to consider are
perspective and how the shadows will match. If
there are several separate elements to combine,
they should ideally all be photographed with
matching camera viewpoints and lighting.
The most common problems, concern matting and the
way the edges of a pasted element give away the
fact that a picture has been retouched. People
often leave the edges of a pasted element too
sharp, so it looks like a cut and paste job,
whereas in reality a photographic edge should be
much smoother. The remove white/black matte
commands are a bit crude and I prefer the
flexibility of the Defringe command. Instead of
defringing you could also try shrinking and
feathering the outline selection (which I
describe here), convert the selection to Quick
Mask mode and refine by pushing out the edges
from within using the paint and smudge tools.
The original images were shot against light,
plain coloured backdrop. Instead of spending ages
perfecting the outline masks I took a few short
cuts by making full use of Photoshop's layers and
the different overlay modes.
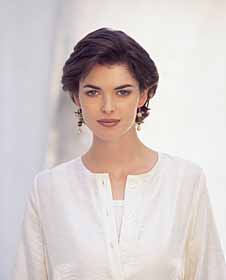
1) In this example the
background is altered by inserting a new backdrop
on top of the original image, rather than pasting
the original as a cut-out. The advantage being
that you retain all the subtle detail of the hair
outline. Begin by making an outline mask as
described in the last example - just concentrate
on getting the hair outline right, then use the
paths tool to draw around the shape of the neck
and body. Convert the path to a selection and add
to the mask.
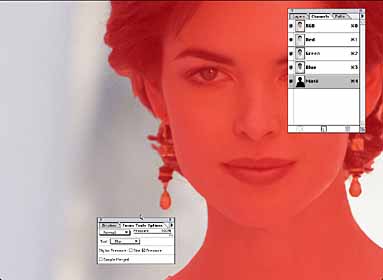
2) As before the mask
should have a soft edge. Working in Quick Mask
mode, blur around the outline formed with the
paths tool to introduce a gentle feathering.
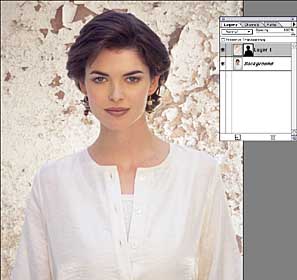
3) Time to add the backdrop
which is placed as a new layer above the
background layer. This is a shot I took of a
crumbling wall, the colours match well, so there
is no need to adjust this image. To reveal the
model, add a layer mask, load the mask as a
selection (Option-Command-4), inverse the
selection and fill with black (Press 'D' to
restore default foreground / background colours
followed by Option-Delete).
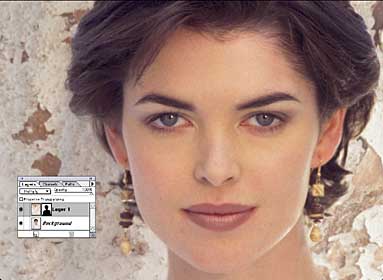
4) Change the overlay mode
to Multiply. You'll find now the blend will look
much smoother, this is because the brightness
values of the pixels in the backdrop layer are
now reacting with the brightness values of the
pixels below. Selecting Darken mode will also
produce good results. Refine the layer mask with
brush/smudge/focus tools if the blend doesn't
look right yet.
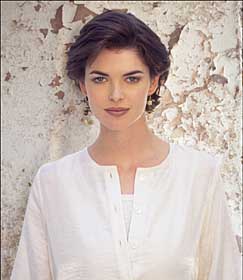
5) The shading from the
previous background inter-acts well with the new
backdrop. This can be enhanced by gently burning
in with the toning tool on the left of the
picture and dodging on the right with a very
large brush size set to a low pressure setting.
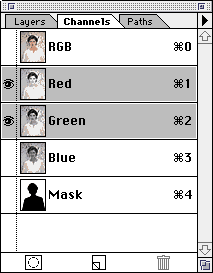
6) The image is nearly
complete - all that remains is to sharpen and
carry out a few final checks. Unsharp masking is
best carried out at the end of a retouching
session and there are ways you can improve the
quality of the filter sharpening. Do a test first
- adjust the Amount setting but also try varying
the Radius and Threshold values to see which
looks best. Undo the filter and repeat, but this
time only activate the Red and Green channels
only (shift click to select them) - this is
because the Blue channel tends to produce more
noise than the other channels after sharpening.

7) When you open the
Unsharp Masking dialogue box the values will be
the same as before when you carried out the test.
Divide the Amount value by a quarter and apply
the filter four times. The three images above
show left: no filter, centre: standard Unsharp
masking, right: the gradual method with the blue
channel turned off.
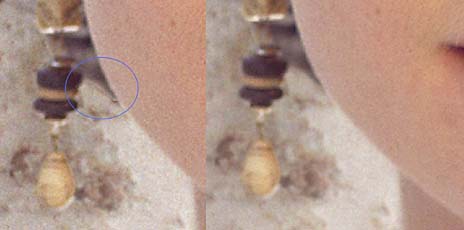
8) Unsharp masking can
produce unwanted artefacts. Above is an example
showing the effect of sharpening the model with
and without the use of a feathered outline
selection. The outline mask is loaded as a
selection, shrunk by choosing contract 2 pixels
from the Select/ Modify sub-menu followed by
Feather (2 pixels). Sharpening will occur only
within the selection. The effect is subtle - note
how the jagged pixels I've circled disappear in
the right-hand example.
Rasterised text and graphics will suffer in
appearance if sharpened. It is usually a good
idea to keep these on a separate layer and
sharpen the image layers only.
Extract originally published in MacUser
1996. Copyright: Martin Evening
|