| Creating Textures with
Photoshop 4.0 and KPT Powertools Looking for a background texture
image? Here's how to render your own, and all the
tools you need can be found in the filter menu.
The following filters will be used: KPT Power
tools, Distort-wave, Render-Lighting effects,
Sketch-plaster and Brush strokes-splatter. To see
an example of this technique in a finished
picture, check out the article on tuberculosis in the science setion.
1) Create a new document.
For this example, the pixel dimensions were
1200X800. It is important to note that the
following effects settings would need to be
adjusted for other document sizes. To begin with,
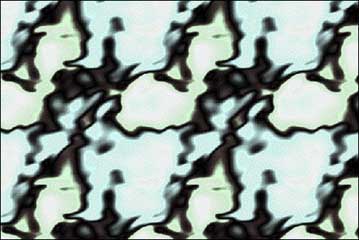
I filled with a 'Dean ice scape' texture from
Kai's Power Tools Texture Explorer, set to
512X512 tiling.
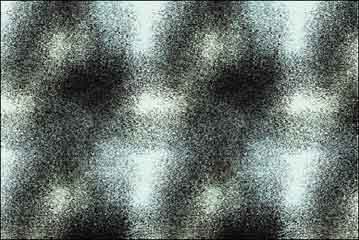
2) In my opinion, Kai's
filters are fine as a starting point. With so
many extra filters at your disposal, why not take
things further? Here a KPT Pixel storm filter was
added to mix things up a bit.
3) The wave filter is a
favourite of mine. Remember the above settings
worked on a 1200X800 pixel sized image. Here are
a few tips: For larger pictures, increase the
scale settings. For example: If you were testing
an effect at 50%, repeat everything on an image 4
times bigger at 100%. The number of generators
setting instucts the filter to electronically
throw more stones in the water. Experiment with
the wavelength and amplitude settings - try
keeping the sliders close together and also far
apart to see the full range of possibilities.
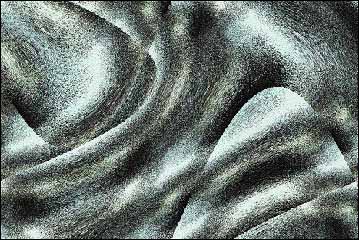
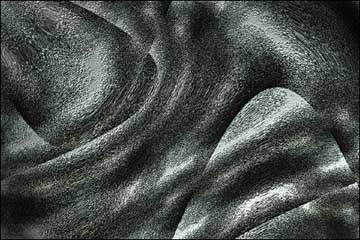
4) Here is the result I got
after applying the wave filter. So far so good,
one can keep adding more variations, it's just a
case of knowing when to stop.
5) A neat feature of the
Lighting effects filter is the 'Texture channel'
bump map facility. I selected the blue channel as
the texture map, with 'white' set as high. In
fact, one could use any of the other colour
channels or an alpha channel.
6) With the lighting
effects applied, I faded the filter to 85%
opacity, keeping to the normal overlay mode.
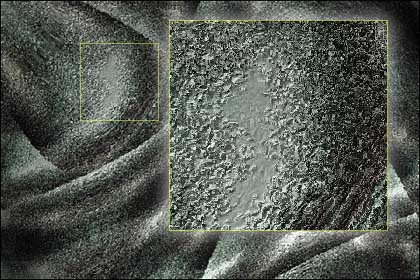
7) To complete the picture,
add more detailed textures, I applied the plaster
filter from the sketch sub-menu with the darken
overlay mode at 15% (image balance 15, smoothness
2.00, lighting - Top). Then I added a spatter
filter from the brush strokes sub-menu at 80% and
made a few adjustments to the colour via the
hue/saturation dialog box.
Copyright: Martin Evening
|


