| Emulsion lift-off technique A few years ago, it was
discovered you could separate the emulsion layer
of instant print films from their base by
immersing the print in a specially prepared
solution. The soft, thin emulsion could then be
transferred or repositioned onto another paper
base like a fine art textured paper. Because the
emulsion is completely malleable it's possible to
create interesting distortions and folds.
Photoshop may lack the freeform distortion tools
found in Live Picture or Kai's Goo, but the power
is there to create interesting effects when you
use a combination of distortion filters like
Shear, Displace and Wave. The latter has one of
the most complex and bewildering dialogue boxes
to be found in Photoshop. The settings used here
will have a very different effect on images that
are not the exact same size, if these don't work
at first, try varying the scale sliders.
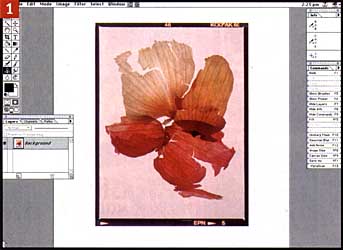
|
1)
Open the image, set the background colour
to white and enlarge the canvas size to
allow enough room for the following
distortions.. |
| 2) Apply the Distort Shear
filter. Add points to the shear line in
the dialogue box and drag to define the
curve distortion along the vertical axis.
|

|
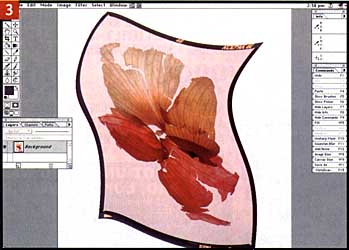
3) The shear filter
distorts the vertical plane only, so you'll have
to rotate the image 90 degrees, repeat the
process with a different shear if you like and
then rotate the image back again.
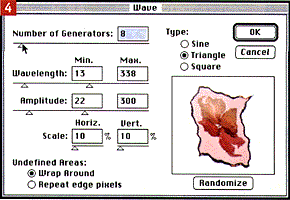
|
4)
Now enhance the distortion with the
Distort Wave filter. You can use the
triangle or sine wave with the settings
shown here, but as I said earlier, more
than likely you'll have to experiment
with the various controls, though I would
recommend a low number of generators. The
scale settings magnify the effect, so if
you create a trial image at low
resolution, increase the scale setting
when repeating at higher resolutions.
|
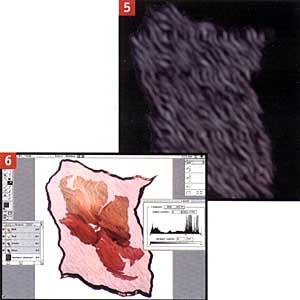
| 5) I created a texture
channel which could also double as a
displacement map. Create a new channel,
fill with the Filter Render Texture fill
filter and select a texture like 'driven
snow' from the Textures for Lighting
effects on the Adobe Photoshop CD ROM. I
manipulated this texture with a
combination of Scale (enlarge), Gaussian
blur, Threshold, motion blur, levels,
more Gaussian blur and filled the border
with black. 6)
Load the texture channel as a selection
and Adjust Levels, darkening the selected
areas - adding a rippled texture. This is
optional, but If you want, convert the
new channel mask into a separate
grayscale Photoshop image and use this as
a displacement map. Have the main image
open only, choose Filter Distort
Displace, (keep the displacements to
around 5 pixels) and open the saved map.
|
|
|
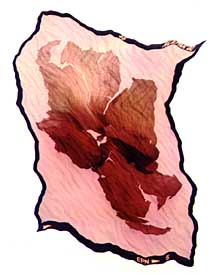
Final image I copied the background
layer and loaded a rough paper texture
into a new channel. I applied Lighting
effects to the new layer,using the paper
texture channel as a texture map. The new
layer was blended at 25% in Normal mode
with the original.
Copyright:
Martin Evening 1997
|
|